As we strive to deliver the simplest and most secure end user
experience, we have released, via the Microsoft Enterprise Application
Gallery, the Solve Portal SSO application.
Why we have used the Microsoft Enterprise Application Gallery:
Applications follow the Microsoft approval process and are tested and published by Microsoft.
Pre intergrated: Applications in the Microsoft
Application Gallery are pre intergrated with Microsoft Entra ID,
providing a streamlined deployment and configuration process for single
sign-on (SSO).
Ease of Configuration: Gallery applications offer a
simplified and minimal configuration process, as most of the generic
settings are already created in Azure for the users.
Support and Documentation: Gallery applications
come with step-by-step configuration tutorials and support, making it
easier for organizations to onboard these applications
Prerequisites
You have a Tenancy with Microsoft Entra ID
An admin account with one of the following roles
Global Administrator
Application Administrator
Cloud Application Administrator
** You may need your IT provider to action this setup.
Once configured they should provide the required Federation Metadata XML file to be uploaded.
How to Configure TechSafe Portal to use SSO with you MS Entra ID
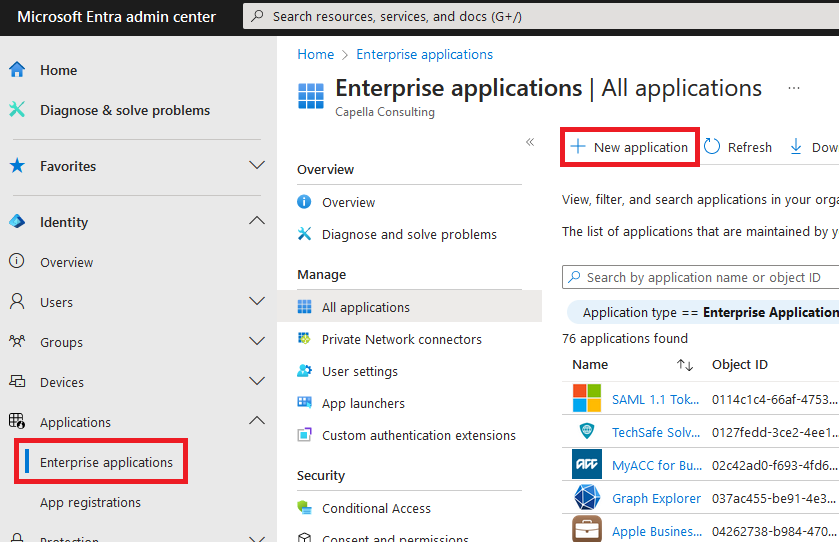
1. Open Entra Admin Center, https://entra.microsoft.com/#home
2. Select Applications -> Enterprise Application and New Application
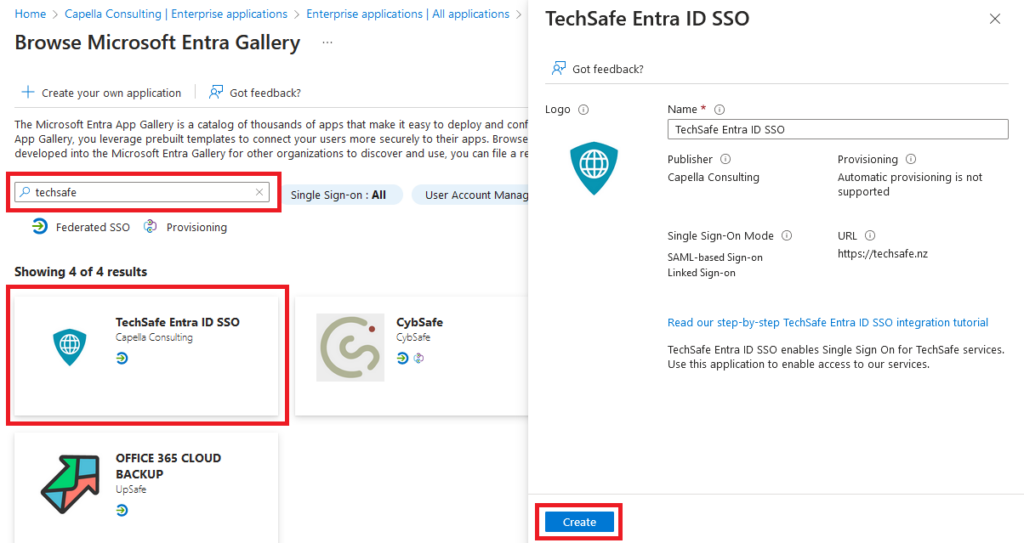
3. Enter techsafe in the search application text field.
4. Select the TechSafe Entra ID SSO application as shown and select Create.
** If the Create button appears greyed out your account does not have sufficient rights to perform this action. See the Prerequisites for more details.
5. Managing who can authenticate using the application.
a. You may allow all users to use the app for authentication OR limited it to define users/groups for additional security.
b. Most commonly, and recommended initially, is to allow all users to be authenticated.
NOTE: All TechSafe portal admin users must be invited to join the platform and register before gaining access. This app only provides authentication services, authorization is manged within the portal. EG Being able to authenticate does not automatically grant access the TechSafe Portal.
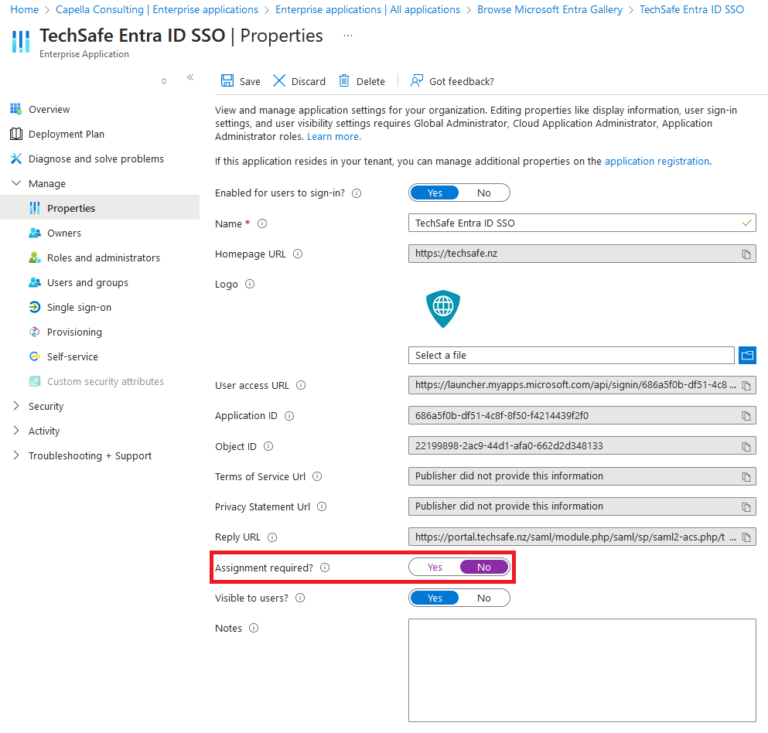
c. To allow all users access Select Manage -> Properties and turn assignment required to No and Save
d. OR Select Users and Groups to assigned defined users and/or groups access only.
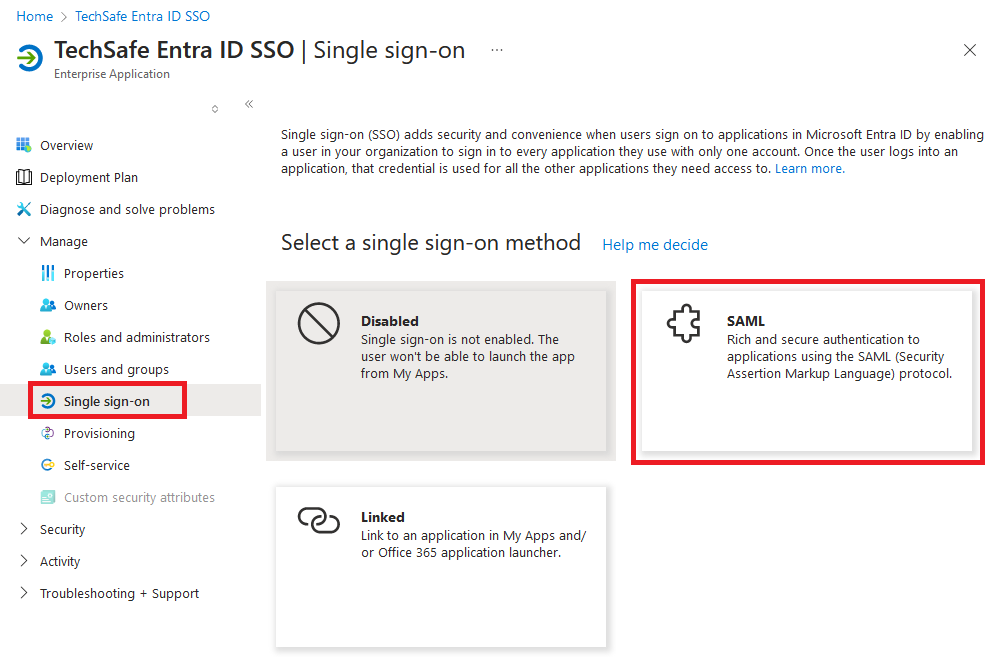
6. Select Manage -> Sign Sign-on -> SAML
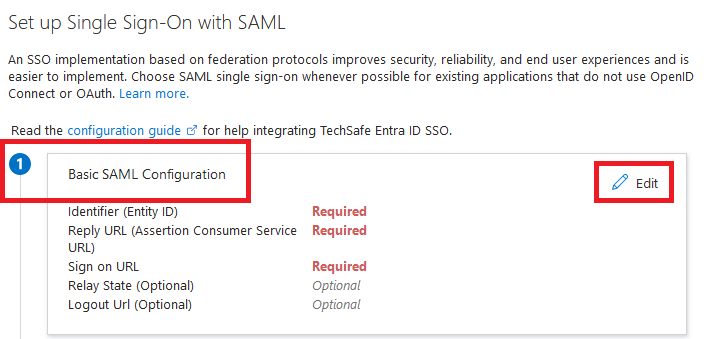
7. In the configuration screen presented select Edit in the first card, Basic SAML Configuration
8. In the Basic SAML Configuration window, complete the following steps:
a. The Identifier (Entity ID) field is auto populated, no actions required.
b. Reply URL (Assertion Consumer Service URL)
ii. Click Add Reply URL to present the text field.
ii. Copy and paste the URL from the Patterns description, https://portal.techsafe.nz/saml/module.php/saml/sp/saml2-acs.php/techsafe-sp , in the text field.
c. Sign On URL
i. Copy and Paste the URL, https://portal.techsafe.nz , in the pattern’s description into the Sign On Url text field
d. Relay State (Optional)
i. This field remains blank.
e. Logout URL (Optional)
i. Enter https://portal.techsafe.nz/logout.php into the available text field.
f. Select Save.
Once filled out with the above information. Use the screenshot below to verify
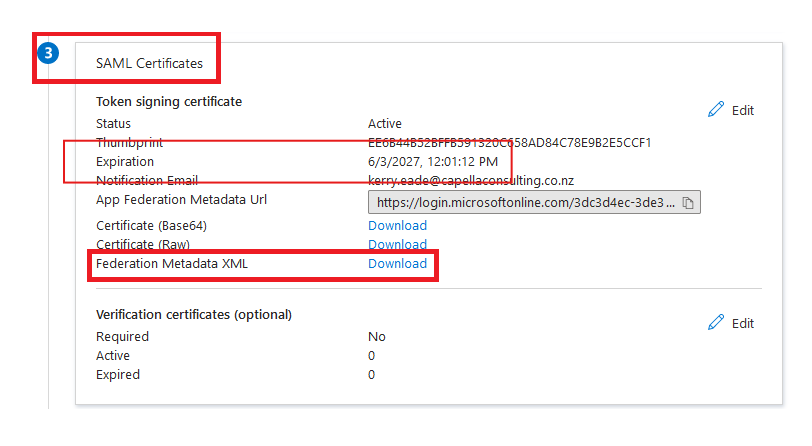
9. Still in the Single sign-on pane, navigate to section 3 of the Set up Single Sign-On with SAML window.
10. Download the Federation Metadata XML by selecting the download option.
11. If you’ve completed this request through the automated on-boarding process, please use the ‘Upload SSO XML’ link found in the on-boarding email. Alternatively, if you’ve been contacted directly, please email the XML as requested.
12. Please also send an email to support@capellaconsulting.co.nz with the Expiration date of the certificate so we can track it to ensure we renew it before experiation.